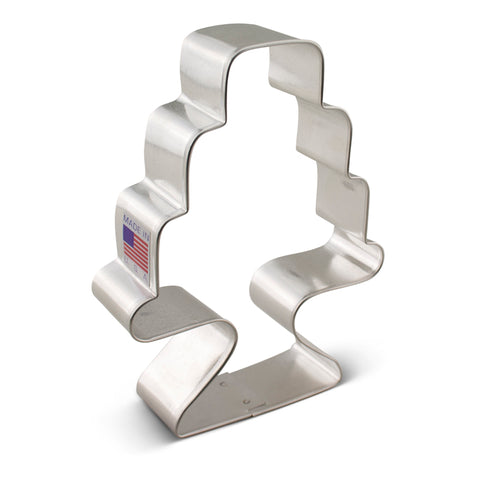
Have you seen the NEW cake on stand cookie cutter? It's divine! Right?
I have created two different designs with this cutter. The first is a cute rainbow heart cake.

Check out the video on how easy it is to make this design. I am using royal icing to decorate this cookie. Click here to check out my recipe.
To create the design, I used the small hearts stencil and the royal icing scraper.
Mixing 8 different icing colors can take about an hour. So, if you're planning a rainbow cookie project, it might be worth it to mix your colors the day before. That's what I did! I mixed the following icing colors:
White (pipe and flood consistencies)
Red (pipe and flood consistencies)
Deep Pink, Orange, Lemon Yellow, Leaf Green, Sky Blue, and Regal Purple (stiff pipe consistency for stenciling)
Steps to create this cookie:
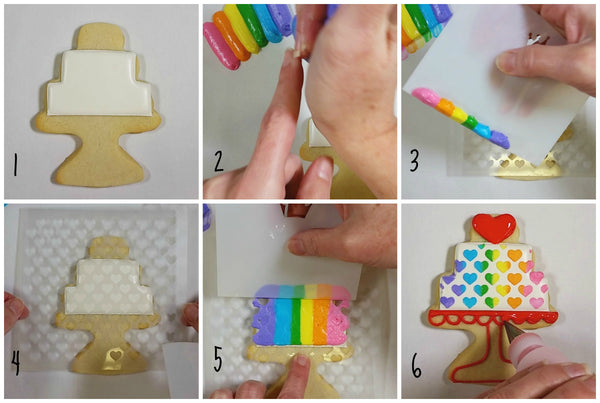
- Outline and flood the white cake base. Allow to dry for at least 4 hours before stenciling. I like to use a fan to help dry my cookies.
- Squeeze or smear out a rainbow of icing on a piece of parchment. Keep the 'rainbow' covered with a damp paper towel to keep the icing from drying out and a crust from forming. The icing should be a stiff consistency so it holds it shape when stenciling. Also, make sure the width of the 'rainbow' is at least as wide if not wider than the space that is being stenciled!
- Scrape up a small section the icing rainbow onto a scraper or offset spatula.
- Place stencil on cake with about 5 hearts across the bottom of the cake.
- Spread evenly across the stencil on the cookie. Remove excess. Peel off stencil.
- Outline and flood heart topper and pedestal in red. Add a white accent mark on heart topper while still wet. Allow to dry before packing.
We are officially in the Valentine cookie season. To celebrate all stencils, scrapers, airbrush color, and the stencil genie are 10% off until Friday, Jan 22.


More Valentine's fun to come!
Happy Decorating!
Anne

A message from Anne
“My blog is a collection of tidbits about the things I love... sugar cookies, baking, great food, cute stuff, and life in Happy Valley. Check back often for updates!!”
Get your cookie fix
Recent Posts